Blog

  • My First Experience Using a Sauna

    https://www.tripadvisor.com/LocationPhotoDirectLink-g54805-d11832625-i229974061-GreatLIFE_Woodlake_Athletic_Club-Sioux_Falls_South_Dakota.html

    As a member of the gym Greatlife, I have always been interested in trying out the sauna rooms there. I was curious to know what kind of health benefits can be achieved by using saunas. There a a few different Greatlifes in Sioux Falls where you can use these dry saunas before a workout, after, or just for the experience itself.

    Dry saunas are small enclosed rooms where the temperature is very high, with the humidity staying relatively low. At Greatlife they are located in the girls locker room or boys locker room. respectively. These rooms will lead to your body temperature to raise higher, to a point where you will start to sweat a lot. It may seem weird to want to sweat a lot, but these rooms can lead to a lot of potential benefits.

    Sauna benefits may include easing pain, reducing stress, and improving cardiovascular health, according to Medical News Today’s article, “What are the benefits and risks of saunas?” When a person sits in a sauna, their heart rate increases and blood vessels widen. This increases circulation, which mimics the effects of low to moderate exercise depending on how long you stay in the sauna. Increased blood circulation may help to reduce muscle soreness, improve joint movement, and ease arthritis pain. The sauna may also promote relaxation through the increase of circulation. Sauna use is linked to lower cardiovascular health issues, lower blood pressure and enhanced heart function. Saunas can also help to open your airways and clear out phlegm, helping you to breathe better. The best course is to use a sauna along with regular exercise for the best results. The amount of time you stay in the sauna as well as how often you go can vary the health effects you will receive. https://www.medicalnewstoday.com/articles/313109

    It is important to know however, that saunas may not be suitable for everyone, and there are factors that will make using a sauna dangerous!

    Saunas may not be suitable for people who have low pressure, have had a heart attack, are pregnant, children, or if you are sick. You should consult your doctor if you have any of these conditions and want to see if they would advise you to use a sauna or not. It can also be dangerous to use a sauna if you are dehydrated, are using substances like alcohol, or if you are in the sauna for too long. These factors may lead you to feeling dizzy or nauseous and lead to passing out. https://www.medicalnewstoday.com/articles/313109

    In my experience, I found the sauna to be very relaxing and to relieve a lot of stress. I was initially unsure of what it would be like or if I would feel any benefits. I made sure to drink plenty of water before I went in, as I have a tendency to get nauseous if I am not well hydrated. I made the mistake of bringing my phone and water bottle in with me at first. This is not advised because your phone and any metal will get very hot. It took about a minute before my face was sweating and a few more before the rest of my body was sweating. I ended up taking my phone and water bottle out after 5-10 minutes, rehydrating, cooling off and then re-entering the sauna.

    The second time, my body heated up a lot faster and I was trying to figure out what to do while I was sitting in there. I ended up laying against the wall in a comfortable position and counting to 10 minutes. The time was passing very quickly and I was making sure I wasn’t feeling sick or uncomfortable. After the 10 minutes passed I decided to get out, cool off, and drink more water so I could stay hydrated.

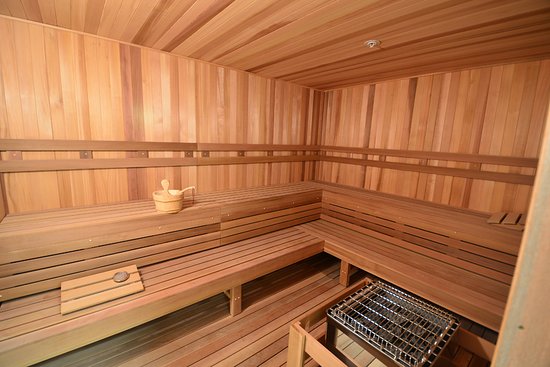
    I ended up going back into the sauna for a third time. This time I was focused on trying to meditate and seeing what effects my body was feeling. The sauna rooms are usually very dark, quiet, and have a calming wooden atmosphere. As someone who always has my mind running, it was nice to be able to clear my head, be in the moment, and just relax. It was very warm and cozy, leading to a zen feeling for me where my stresses melted away for a while. I actually enjoyed being able to sweat so much as I usually never get that sweaty during workouts. I noticed also that my heart rate sped up. I left once I felt that it was too hot to handle anymore.

    Overall, for me, the sauna experience was very relaxing. It is a great place to meditate, get in touch with your body and mind, and maximize your health after working out. I would definitely recommend them for people who are suitable to use them to try out. I don’t think everyone would enjoy the experience, but it is worth it to try out and see how you feel, and if you like the effects.

    If you have high stress/anxiety it is a great place to relieve stress, connect with your body, and calm down. I was very anxious and not in a good mood before my sauna session, but afterwords I felt very at ease and happy with my experience. Let me know what you think of saunas or if you would like to try it out, as well as what kind of sauna you think is the best! (wood buring, electrically heated, infrared room, steam room)

  • Getting Into Photography – Basics

    Digital photography can seem very daunting at the start. Once you understand the basics of how to use your camera and what elements go into a photo, you can progress very quickly.

    One of the foundations of understanding photography is to understand the exposure triangle. The exposure triangle is a diagram that helps to explain how shutter speed, aperature, and ISO effect the exposure on your camera. Exposure is the way your camera senses and interprets the image you are taking. If your exposure is too high or too low, you may have areas that are too dark or too light and will lose detail.

    Shutter speed controls motion and light. Shutter speed is how fast or slow your camera takes and image with a range from 30 seconds to 1/4000th of a second. A slower shutter speed shows motion in an image and can capture more light in an image. If your image is very bright and has a lot of detail (like a landscape) you will need a slower shutter speed in order to capture all of the small details. For images with a shutter speed slower than 1/60th of a second, you will have to use a tripod or stabilizer for your camera. This is because we are not able to hold our cameras perfectly steady and you do not want your image to become blurry. Faster shutter speed freezes action and is used in lower lighting situations. You can work with shutter speed to create motion blur effects as well.

    Aperture controls depth of field, light, and can be used to achieve a creative effect. Aperture is measured with f stops, ranging from f/1.4 to f/22 in some cameras. A lower aperture (f/1.4) creates a shallow depth of field, where only a small portion of the image is in focus. With a lower aperture your camera lens is open more, so it will capture more light. The part of the image that is farther away will not be in focus. A larger aperture (f/22) closes the lens more and lets in less light. This will result in a much deeper depth of field, where every part of the image is clear (foreground, subject, background). Overall controlling aperture is important for a photography to be able to focus on what is important in the image and the message they are trying to convey.

    ISO is the light sensitivity of your camera and will affect your image quality. Normally it is good to use the lowest ISO setting on your camera, because it will be the maximum quality. However, when it is darker you may have to turn your ISO up in order to see the image more clearly. A lower ISO (100) will turn your light sensitivity all the way down and is great for very bright, outdoor images. A higher ISO is used for indoor lighting or lighting at night, where it is much darker and harder to capture details. This will turn your light sensitivity all the way up, but may result in lower quality images.

    In manual mode, you will want to adjust shutter speed, aperture, and ISO to achieve a 0 on the exposure scales. This is measured where negative numbers are under exposed, positive numbers are over exposed, and 0 is the perfect exposure. There may be some circumstances though, where you will intentionally want the exposure to not be a perfect 0. It is important to make sure though, that there are no parts of your images that are too dark or too bright to see.

    You can use a DSLR simulator online to practice these concepts for free, before you go out with your camera.

    Another important concept to understand for photography is white balance. White balance controls how your camera interprets colors, as not all lighting achieves the same color tones. Different light sources emit light at different color temperatures, causing a color cast on your image. Lower color temperatures are warmer, shifting towards red. Higher color temperatures are colder, and shift towards blue. The Kelvin Scale is used to measured light temperature. This scale goes from candlelight, tungsten bulb, sunrise/sunset (clear sky), fluorescent lamps, electric flash, daylight with clear sky (sun overhead), moderately overcast sky, to shade or heavily overcast skies.

    You can either use the auto white balance setting, custom setting, or preset options from your camera to set the white balance. Setting your camera to the appropriate white balance setting ensures that your colors will turn out accurately in your photos. Or these settings can be used to create a creative effect where you change the color tone of your photo. My camera includes a tungsten setting, fluorescent setting, daylight setting, flash setting, cloudy setting, and shade setting for white balance preset options. You can also set a custom white balance by taking a photo of a card or paper in the setting you are taking photos in, and then setting this image as your white balance in the custom options.

    I hope that this post has helped you to understand some of the basics of how your camera works and how you can use these settings to change the result of your images.

  • Getting Into Photography

    In fall 2023, I took a digital photography class. I was not at all prepared for what this class would be like, or what I would be learning. Overall though, it was a very fun and challenging experience that I would recommend to anyone interested in photography or design.

    I am fortunate that my older sister is a professional photographer and has a backup camera that I can use. Before, she never trusted me with her camera. When I told her I was taking a digital photography class though, she was excited to let me borrow her equipment and camera. I have been using her Cannon T6i Rebel Camera, which includes a variety of lenses, multiple camera batteries, a large and small tripod, light reflectors, camera bag, sd cards, and a black & white backdrop. She did require me to get her some new lens covers and I bought a white card, along with some lens cleaners.

    Working with an expensive pieces of equipment, you must make sure to store your camera and lenses properly. The lens caps and camera cover also insure that minimal dust/debris will get into your equipment, making it last longer. It was very daunting working with this equipment at first, as you also have to make sure not to drop anything and keep it away from wetness. With the cannon, you can also turn the screen inwards when you are not using it.

    After my sister explained all the buttons on the camera to me and how to use it properly, I still had no idea how to take an ideal photo. The digital photography class was what taught me the basic skills and knowledge I needed to progress my photography skills. We first started by learning the basics about exposure, and how it is achieved through shutter speed, ISO, and aperture. It is critical to learn about these concepts as well as white balance in order to achieve different creative photo styles/effects and become a master of photography.

    Digital photography not only helps you to take beautiful and unique photos but also can help you in a manner of other design applications. These applications include, commercial photography, landscape photography, portrait photography, digital imaging, and creating unique content for videos, ads, layouts, or websites. On this blog I will be sharing the things I have learned in this digital photography class as well as other classes and context that this design and technical knowledge has become useful. Topics will include: depth of field, white balance, high key images, low key images, HDR composites, macro photography, motion blur, portrait lighting, underwater photography, sunset silhouettes, and civil twilight photography.

    Thank you to Sylvia Larson for letting me continue to use her camera and equipment. I have learned so much and photography can be so much fun! I fully intend to buy this equipment from her before I graduate, and continue to experiment more with photography for my own personal interest as well as creative projects. That you to my professor for being a great guide and influence on our learning journey as students, by providing knowledge and experiences in photography for us. At the start I really didn’t think I would be cut out for the digital photography class, but over time I have become a lot more confident in my skills and abilities.