Digital photography can seem very daunting at the start. Once you understand the basics of how to use your camera and what elements go into a photo, you can progress very quickly.
One of the foundations of understanding photography is to understand the exposure triangle. The exposure triangle is a diagram that helps to explain how shutter speed, aperature, and ISO effect the exposure on your camera. Exposure is the way your camera senses and interprets the image you are taking. If your exposure is too high or too low, you may have areas that are too dark or too light and will lose detail.

Shutter speed controls motion and light. Shutter speed is how fast or slow your camera takes and image with a range from 30 seconds to 1/4000th of a second. A slower shutter speed shows motion in an image and can capture more light in an image. If your image is very bright and has a lot of detail (like a landscape) you will need a slower shutter speed in order to capture all of the small details. For images with a shutter speed slower than 1/60th of a second, you will have to use a tripod or stabilizer for your camera. This is because we are not able to hold our cameras perfectly steady and you do not want your image to become blurry. Faster shutter speed freezes action and is used in lower lighting situations. You can work with shutter speed to create motion blur effects as well.
Aperture controls depth of field, light, and can be used to achieve a creative effect. Aperture is measured with f stops, ranging from f/1.4 to f/22 in some cameras. A lower aperture (f/1.4) creates a shallow depth of field, where only a small portion of the image is in focus. With a lower aperture your camera lens is open more, so it will capture more light. The part of the image that is farther away will not be in focus. A larger aperture (f/22) closes the lens more and lets in less light. This will result in a much deeper depth of field, where every part of the image is clear (foreground, subject, background). Overall controlling aperture is important for a photography to be able to focus on what is important in the image and the message they are trying to convey.
ISO is the light sensitivity of your camera and will affect your image quality. Normally it is good to use the lowest ISO setting on your camera, because it will be the maximum quality. However, when it is darker you may have to turn your ISO up in order to see the image more clearly. A lower ISO (100) will turn your light sensitivity all the way down and is great for very bright, outdoor images. A higher ISO is used for indoor lighting or lighting at night, where it is much darker and harder to capture details. This will turn your light sensitivity all the way up, but may result in lower quality images.
In manual mode, you will want to adjust shutter speed, aperture, and ISO to achieve a 0 on the exposure scales. This is measured where negative numbers are under exposed, positive numbers are over exposed, and 0 is the perfect exposure. There may be some circumstances though, where you will intentionally want the exposure to not be a perfect 0. It is important to make sure though, that there are no parts of your images that are too dark or too bright to see.
You can use a DSLR simulator online to practice these concepts for free, before you go out with your camera.
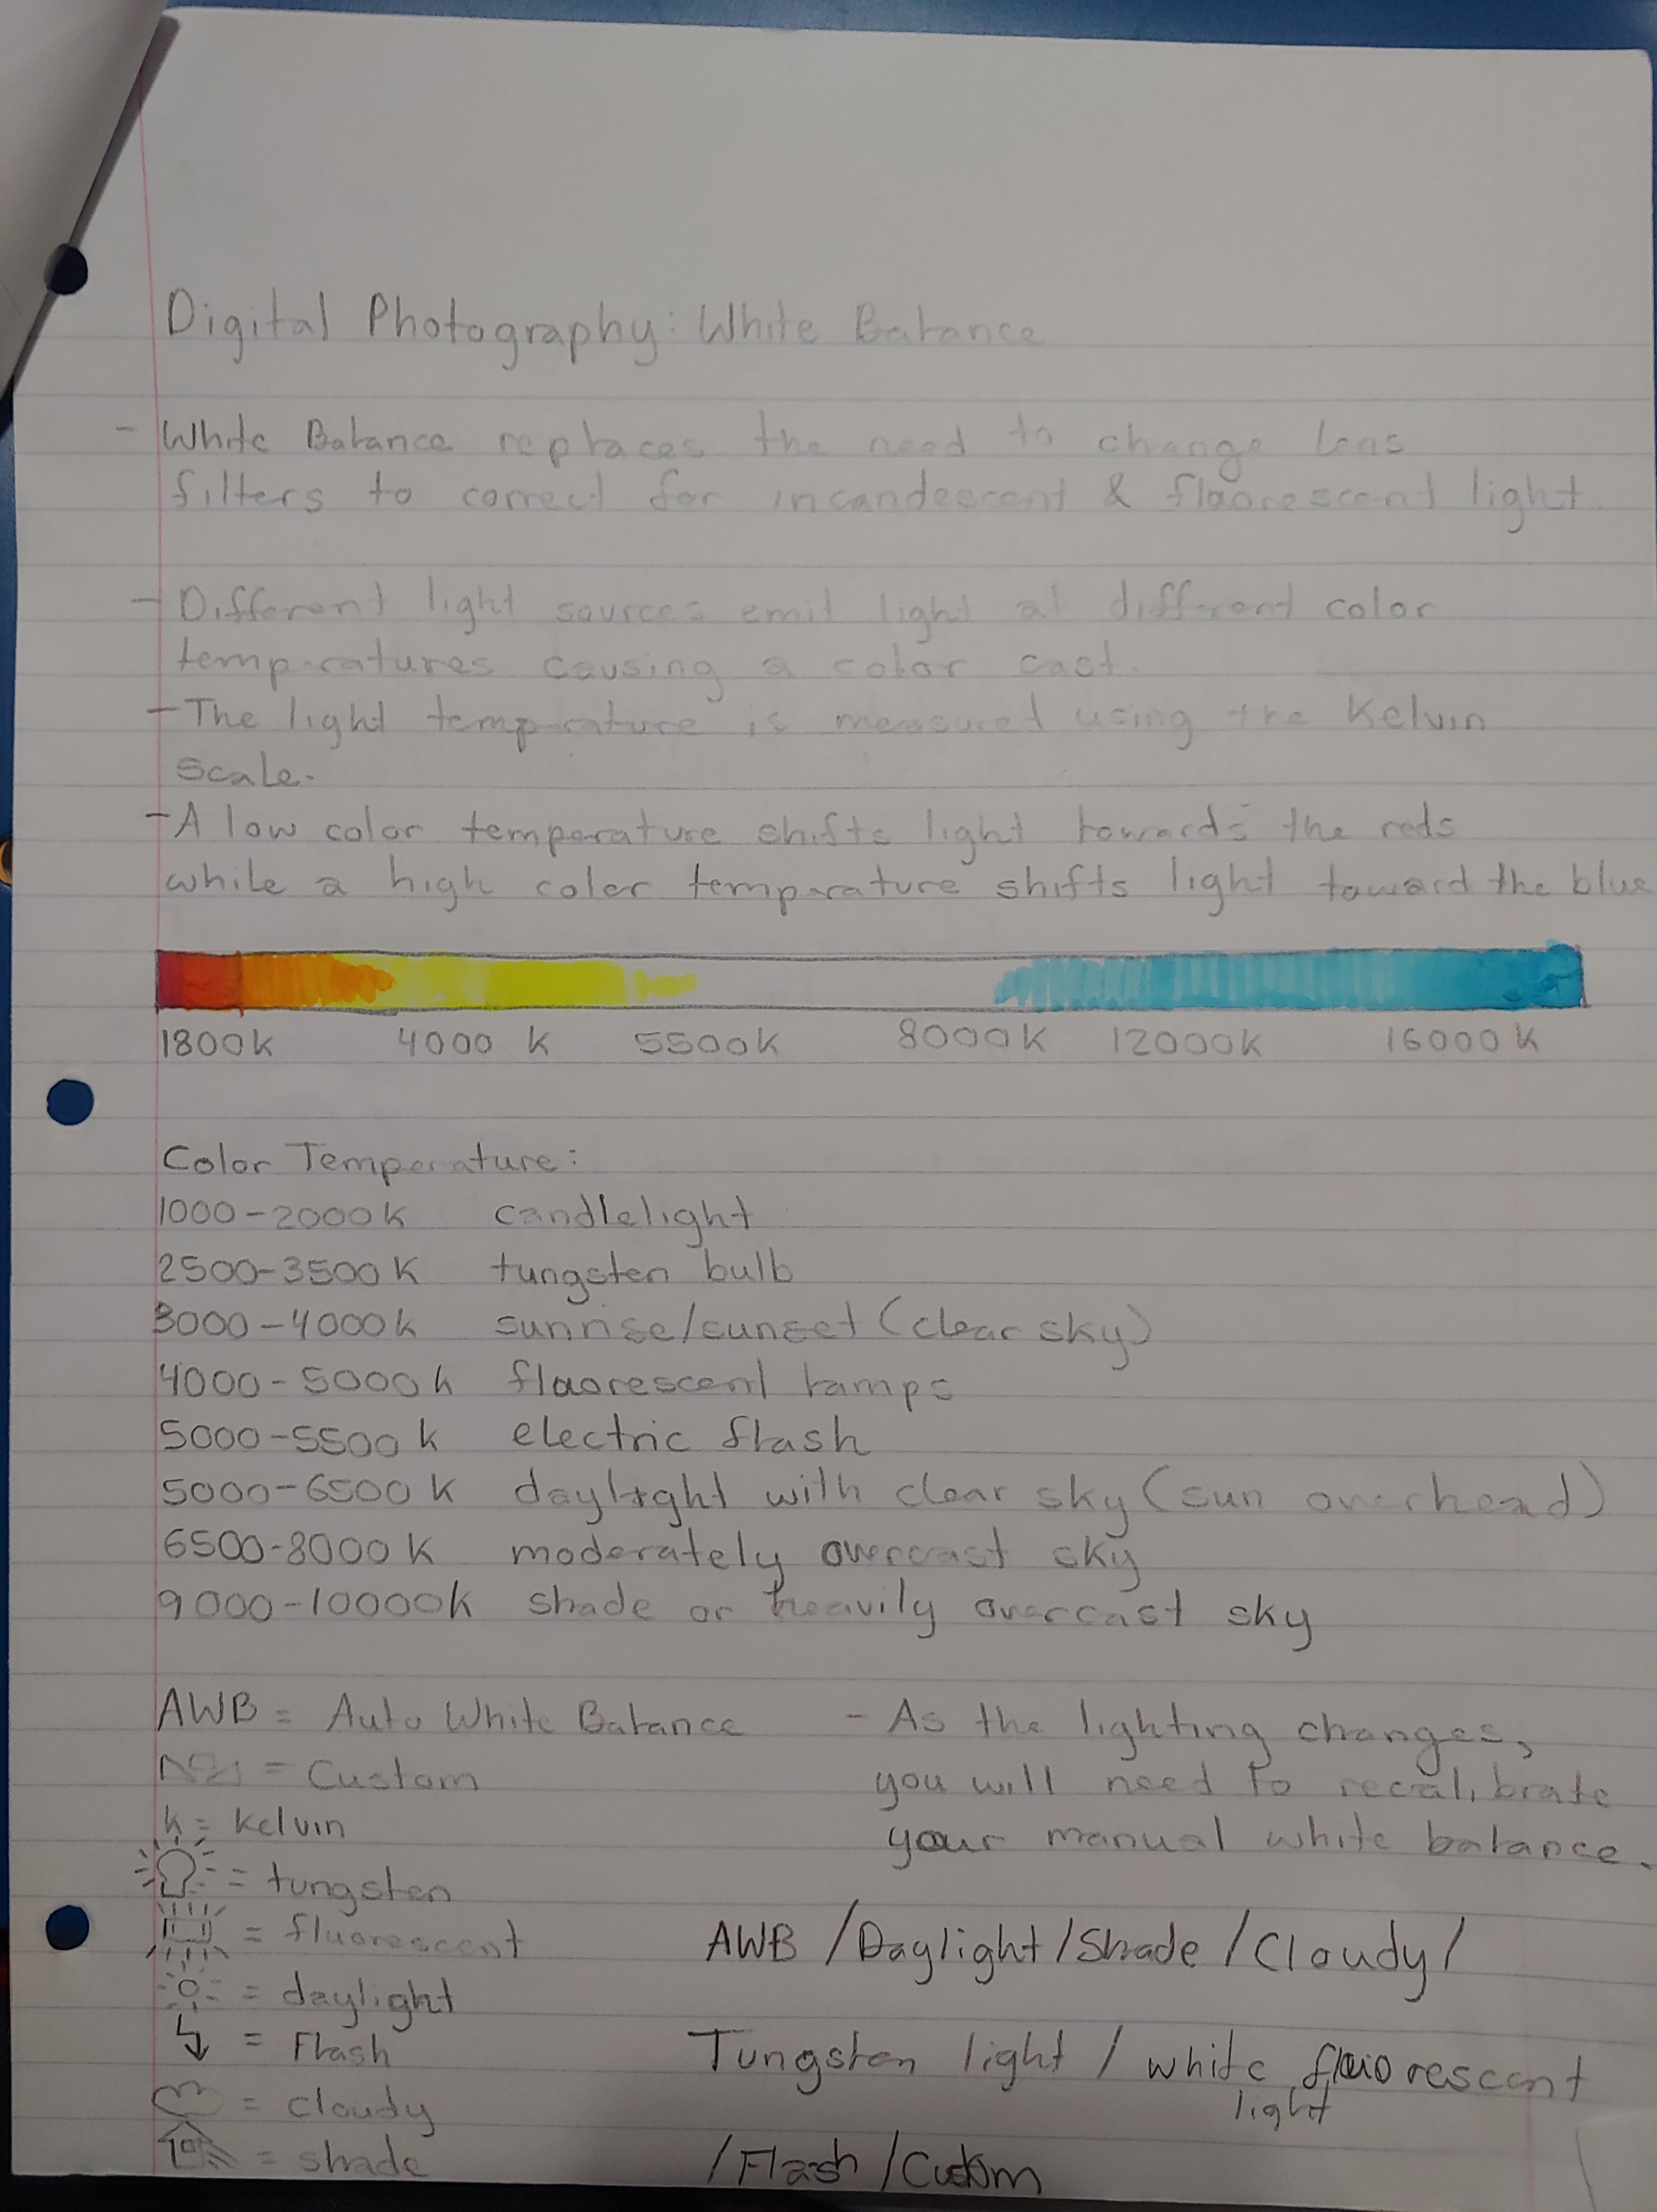
Another important concept to understand for photography is white balance. White balance controls how your camera interprets colors, as not all lighting achieves the same color tones. Different light sources emit light at different color temperatures, causing a color cast on your image. Lower color temperatures are warmer, shifting towards red. Higher color temperatures are colder, and shift towards blue. The Kelvin Scale is used to measured light temperature. This scale goes from candlelight, tungsten bulb, sunrise/sunset (clear sky), fluorescent lamps, electric flash, daylight with clear sky (sun overhead), moderately overcast sky, to shade or heavily overcast skies.
You can either use the auto white balance setting, custom setting, or preset options from your camera to set the white balance. Setting your camera to the appropriate white balance setting ensures that your colors will turn out accurately in your photos. Or these settings can be used to create a creative effect where you change the color tone of your photo. My camera includes a tungsten setting, fluorescent setting, daylight setting, flash setting, cloudy setting, and shade setting for white balance preset options. You can also set a custom white balance by taking a photo of a card or paper in the setting you are taking photos in, and then setting this image as your white balance in the custom options.
I hope that this post has helped you to understand some of the basics of how your camera works and how you can use these settings to change the result of your images.